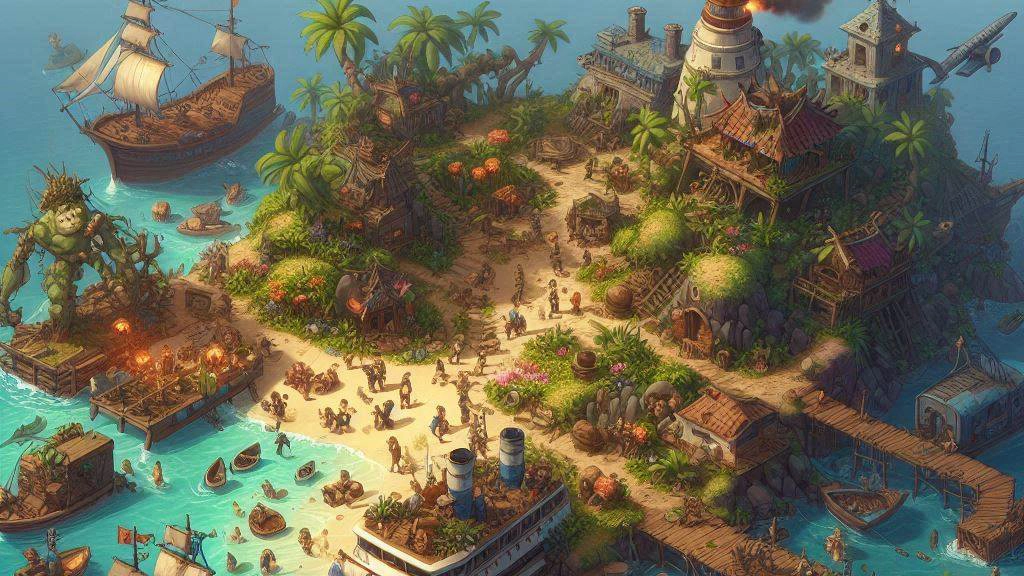
First Days
The first few days in Mad Island are crucial for setting a strong foundation for survival and progression. Here’s a detailed breakdown of what to do during these critical early days:
Day One
- Resource Gathering: Spend the entire day collecting Berrys and Fibers.
- Tool Crafting: Make an axe and a pickaxe.
- Material Collection: Gather at least 50 stones and 50 iron. Look for rocks labeled as rock with a different metal shards texture.
- Wood Gathering: Collect as much wood as possible until the morning of Day 2.
Avoid Villages: Villages are too dangerous to enter during the first day.
Return to Base: Once you have enough wood and other materials, open your map and click the blue flag to teleport back to your base.
Setting Up Base:
- Crafting Table: Make a crafting table from the crafting menu in the lower left, set it down, make a furnace, set it nearby, and fill the table with everything but the iron.
- Furnace: Place iron in the furnace and craft it into 5 ingots or more.
- Iron Bench: Craft an Iron Bench and place it nearby. Fill it with resources and the fifth iron ingot to make a pan, crucial for future crafts.
Day Two
-
Level Up: Open your status window and upgrade a stat based on your preferred play style.
- Dodger: Focus on speed and attack first, then health.
- Tank: Prioritize health, then attack, and possibly speed depending on the shield.
-
Weapon Choice:
- Fast Weapons: Bow, Katana, Iron Sword, Spear.
- Tank Weapons: Any weapon with good parry potential.
-
Minion Strategy: Use minions to fight for you. Increase your follow cap to manage more followers, including natives and fighting animals like bears or werewolves.
Day Three to Five
- Base Upgrades: Upgrade and define your early base with walls, spike traps, and resources.
- Hunting: Prioritize hunting for food and materials.
- Food and Water: Focus on gathering food and crafting a water bag for hydration.
- Skill Points: Level up your characters and focus on skills like Healing, Harvest, Carry, and Smash.
Character Levels: Yona and Man share skill levels but have separate health, attack, and speed levels. Aim for a combined level of 7 to buy your first skill, preferably Healing.
The first few days on Mad Island are all about resource gathering, base setup, and strategic leveling. Avoid dangerous areas, focus on essential tools and materials, and gradually build a strong foundation for your survival and progression.
Materials, Crafting, and Crafting Locations
Crafting Basics Crafting in Mad Island can be complex if you're not familiar with the various crafting tables and inventory management. Keep these key points in mind:
- Set Craftables: Each crafting table has a set list of items it can craft, which changes only with certain quest items.
- NPC Crafting Tables: Some crafts require interacting with NPC crafting tables and hitting the craft button.
- Inventory Management: All crafting tables need to have the necessary resources in their inventory or in a shared chest like Cloud storage or a Spider chest.
Material Sources
1. Hand and Free Tool Materials These materials can be collected without any special tools, just your bare hands or any tool in hand without consuming its durability. Examples include:
- Bushes
- Small cacti
- Berry bushes
- Tree bushes
- Barrels
- Boxes
- Sticks
- Rocks
- Mushrooms
- Shells
2. Axe Materials To collect these materials, you need an axe. Equip the axe and interact with the object or use it on a corpse menu item. Examples include:
- Trees
- Mushroom trees
- Tall cactus
- Thin trees
- Hard wood (requires iron or diamond axe)
3. Pick Materials These materials require a pickaxe. Examples include:
- Stone
- Iron stone
- Gold stone
- Blood stone
- Scrap
- Chaos Ore (requires iron or diamond pickaxe)
4. Shovel Materials Shovels are used to collect materials like dirt, sand, and clay. Use the right-click to dig instead of blocking. Examples include:
- Dirt (from mud, dirt, grass, and roads)
- Sand (from deserts and beaches)
- Clay (from wet mud often found outside villages)
5. Enemy Loot Defeated enemies drop loot that can be collected from their inventory or equipment. Each enemy has a random chance to drop a variety of items. Some items are usable only by certain NPCs, while others can be used by both NPCs and players.
Understanding the sources and methods of collecting materials is crucial for efficient crafting and survival in Mad Island. Focus on gathering the right materials with the appropriate tools to ensure a steady supply of resources for crafting and building.
Loot Drops
In Mad Island, exploring and gathering resources can yield various loot drops. The source of material will be followed by a list of guaranteed materials listed with numbers, going from gathering 0 to gathering 5, and a set of parenthesis with the same, the parenthesis representing materials that aren’t guaranteed. Here is a comprehensive list of loot drops and the modifiers that affect them, organized by their sources and guaranteed materials:
Without Tools
- Rock: rocks 1/2/3
- Stick: sticks 1/2/3
- Bush [leaves only]: leaves 4/6/8/12, ? 4/6/8/12 (grub 1, Herb 1)
- Bush [small tree]: sticks 4/6/8/12, fiber 2/3/4/6, (grub 1)
- Bush [berries]: leaves 4/6/8/12, berries 4/6/8/12, (grub 1)
- Bush [mushroom]: stick 3/4/6/9, (sap 2/3/4/6)
- Bush [small cactus]: cactus 2/3/4/6
- Box:
- Barrel:
- Shell: sea shell 1/2/3
- Fnicker Bar: fnicker bar 1
- Mushroom [color]: mushroom [color] 1/2/3
- Herb [color]: herb [color] 2/3/4/6
- Hive: hive 1/2/3, honey 2/3/4/6
- Coral [color]: coral [color] 2/3/4/6
With Axe
- Tree [oak]: wood 4/6/8/12, acorn 2/3/4/6, (sap 2/3/4/6, sticks 1/2/3)
- Tree [dark wood]: wood 5/7/10/15, (sap 2/3/4/8, sticks 1/2/3)
- Tree [mushroom]: wood 6/9/12/18, (sap 2/3/4/6, acorn 2/3/4/6)
- Tree [thin]: wood 4/6/8/12
- Tree [Palm]: wood ?/?/?/?
- Cactus [tall]: cactus ?/?/?/?
- Tree [Sturdy]: Hardwood ?/?/?/?
- Corpse [dismember option]: 1 selected limb (head, right arm, left arm, right leg, left leg)
- Spooky Tree [enemy chopped down]: Spooky wood
With Pickaxe
- Scrap: 1 item guarantee (rotten flesh 1/2/3, iron 1/2/3)
- Stone [rock]: rock ?/?/?/?, (iron ?/?/?/?)
- Stone [iron deposit]: iron 2/3/4/6, (iron 1/2/3, stone 2/3/4/6)
- Stone [gold deposit]: gold 2/3/4/6, (stone 2/3/4/6)
- Stone [bloodstone deposit]: bloodstone 2/3/4/6, (stone 2/3/4/6)
- Cursed Vase: ? ?/?/?/?
- Chaos Ore: chaos ore 2/3/4/6
With Shovel
- Dirt: dirt 1+level gathering-3+level gathering
- Grass: dirt 1+level gathering-3+level gathering
- Mud [not slowing]: dirt 1+level gathering-3+level gathering, (dirt 1-3, vine 1 {if in swamp})
- Beach: sand 1+level gathering-3+level gathering
- Desert: sand 1+level gathering-3+level gathering
- Mud [slowing]: clay 1+level gathering-3+level gathering
Dead Enemies (excluding bosses)
Some items may be equipped and require the player to open their equipment to find.
- Spider [cave]: nothing
- Spider [dark forest]: 2 web
- Bat: bone 2/3/4/6
- Snail: snail [dead] 1
- Crab: crab shell 1
- Bee: grub 1
- Male Native: 1 item guarantee
- Big Native:
- Female Native:
- Native Girl [patch]:
- Native Boy [patch]:
- Native Grandpa:
- Native Grandma:
- Petite Native:
- Amazon [patch]:
- Angler: pink stone ?/?/?/?
- Shark:
- Werewolf:
- Bigfoot: (bigfoot peen sword 1)
- Milky: high-grade beef 2/
- Neck:
- Skeleton:
- Daddy:
- Dog Guardian:
- Guardian:
- Mummy:
- Underground Man: Study Bone 1-3, cursed orb 1-3
- Underground Old Woman: cloth 1-3, (sturdy bone 1-3)
- Underground Woman: cloth 1-3, underground woman’s clothes 1
- Vampire Scorpion:
- Worm: strange liquid 1/2/3
- Ent:
- Cursed Tree:
- Whooper:
- Alligator:
- Crawdad:
Bosses, Bases, and Beats
Once you reach Day 5 in Mad Island, the focus shifts to building a base, fighting bosses, and progressing through the story. This chapter covers quests, so if you want to avoid spoilers, skip to the next chapter, "NPCs, Combat, Controls, and Care". Quests are listed in Collection order, which can affect their difficulty based on whether you complete them sequentially or not, as some are time-sensitive. If a quest or collection item is not part of the main storyline, it will be categorized in the Yona Quest, Man Quest, or Worldly Possessions sections.
There are three types of Quests:
- Both MCs (Green Fog)
- Yona Quests (Red Fog, only accessible by the Female MC)
- Man Quests (Blue Fog, only accessible by the Male MC)
The entire main storyline can be completed as Yona, but not as Man.
Main Story Quests
-
Meat Bench Quest:
- Objective: Defeat the Native Chieftain.
- Location: Head north from your spawn location on the beach. You will pass a small camp with two tents and encounter a green fog wall. The Native Chieftain is beyond this fog.
- Boss Actions:
- Punch Attack: Can be dodged by running through him.
- Crouch and Jump: He crouches and then jumps, creating a significant area of effect. Best to stay still.
- Pink Ball Attack: He combines purple particles into a pink ball that flies at you. Move diagonally to avoid it.
- Fishing Pole Heal: He grabs a fishing pole to heal himself when his health is below 1/4. Use this opportunity to deal damage.
- Yona Defeat Animation: If you lose all HP (but not all lives), the Chieftain will choke Yona with a fishing line. You can skip the scene or left-click to watch.
- Reward: The Meat Bench, which enhances corpse and special item use. Useful for early game power boost.
-
Spider Bench Quest:
- Objective: Defeat Spider Boss Spike.
- Location: Take the path on the left side of the beach from your starting base to reach a larger village and the spider cave. The green fog blocks your path to Spike.
- Boss Actions:
- Arm Stab: Spike pulls back his arms and stabs. Move in any direction to avoid it.
- Cave Spiders: He lays down and releases 3 cave spiders. They are one-hit but can leave you vulnerable.
- Web Balls: Spike drops 5 web balls that create slowing terrain. Kite Spike to a different area to avoid them.
- Yona Defeat Animation: If you lose all HP (but not all lives), Spike will pull your limbs until your faint bar reaches 0. You will awaken in a webbed area.
- Reward: The Spider Bench, which provides access to spider chest items. Useful for crafting tables in the radius.
-
Man Bench Quest:
- Objective: Defeat the Uncle.
- Location: Travel east to a river with a bridge. Beyond the bridge is a tent and campfire, with a red fog wall leading to the Uncle’s boss fight.
- Boss Actions:
- Punch: Avoid by moving to the other side or running away.
- Shoulder Check: Leaves him open for 2-3 heavy attacks if missed.
- Yona Defeat Animation: If you lose all HP (but not all lives), the Uncle will strangle Yona until her faint reaches 0. You will awaken elsewhere.
- Reward: The Man Bench, allowing the creation of items related to people like milk machines, knives, and outfits. Useful for arming early game Native Girls and Boys.
-
Green Stone Quest:
- Objective: Defeat Planton.
- Location: North of the swamp, near cliffs and a green fog wall. Planton reveals himself and does not heal between retries.
- Yona Defeat Animation: If you lose all HP (but not all lives), Planton will spank Yona with vines until her faint reaches 0. You will awaken in a village’s mud pit.
- Reward: The Green Gem, revealed after Planton withers.
-
Red Stone Quest:
- Objective: Defeat Scythe.
- Location: In the northwest desert, find the centipede boss Scythe in the mountain’s caldera. Green fog blocks the entrance.
- Boss Actions:
- Side Strikes: Scythe strikes both sides and the middle. Move south to avoid.
- Underground Strike: Scythe sinks underground, making several strikes. Run to the side to avoid.
- Reappearing Attack: Scythe moves towards the player and reappears, used to avoid NPC allies and their attacks.
- Reward: The Red Gem, revealed after Scythe crashes into rocks.
-
Blue Stone Quest:
- Objective: Defeat Necks.
- Location: Climb the mountain in the northeast. A green fog at the peak leads to the arena where Necks attacks.
- Boss Actions:
- Flap Crash: Necks crashes down in a large area of effect. Avoid by keeping a safe distance.
- Screech and Swipe: Necks swipes with each head while approaching. Keep running to avoid.
- Egg Attack: The undamaged head spits out an egg. Destroy or avoid quickly to prevent additional aid.
- Tornado Attack: Necks creates tornados in one of three rows. Avoid by positioning in the center or fog wall.
- Reward: The Blue Gem, accessible after Necks destroys part of the mountain wall.
Seventh Quest: Takumi’s Journal
-
Objective: Complete the quest after the second fight with Takumi. Yona is the only character who can fully complete this quest, although a small portion can be completed by the Male MC.
-
Location: Yona must head up the small hill near the village south of the swamp. A red fog wall blocks the way. You will encounter Keigo and Reika in an intimate moment. Whether you observe or scream affects Keigo's feelings for Reika, impacting the Man quest line for Reika.
-
Proceeding: After following the mountain wall through the swamp, you will reach a break in the mountain with a red fog wall. Takumi, Keigo, and Reika are found with three natives that Keigo kills. You will encounter them shortly after. Takumi will use a taser on Keigo and then on Reika. You can either observe and let Reika have an intimate scene with Takumi or intervene and fight Takumi.
-
Takumi’s Actions:
- Tazer: Deals 45 faint damage. If all faint is lost, it results in immediate death.
- Strike: Deals 9 faint damage. Avoid by running through him and attacking from behind.
- Wild Arm Swing: Causes faint damage and ends with a fart. Avoid by moving perpendicular and striking after the fart.
- Aphrodisiacs: Causes faint damage. Avoid or manage to prevent immediate death.
-
Outcome: After defeating Takumi, he will complain, throw sand in your eyes, and flee. Depending on your choice:
- Siding with Keigo: Reduces Keigo’s love for Reika to 0.
- Siding with Reika: Does not affect their relationship.
- Result: This choice influences events in the Man quest line for Reika and affects the southward quest event if Keigo has 0 love with Reika.
-
Second Encounter: Heading north, you will find Takumi again behind a red fog wall. You will fight him in a different outfit but with the same attacks. Your choices affect:
- Obeying: Yona bows, gets drugged, resulting in a killed state and an intimate scene.
- Killing Takumi: He will no longer be available to interact with, and you will miss the Tranciever but can still access the prison.
- Tying Up: Takumi will need 10 food items in his inventory to continue the story.
Eighth Quest: The Transceiver
Ninth Quest: The Trainer’s Recipe
-
Objective: Obtain the Trainer’s Recipe by defeating Sally.
-
Location: Enter the prison from the cave on the south side or the north side. The second room on either side has a hidden northeast hole where you can encounter Sally.
-
Sally’s Actions:
- Whiplash: Has a decent range. Move perpendicular to avoid.
- Lash Twirl: Slashes side to side, can stun-lock you. Move diagonally away and attack when she finishes.
-
Outcome:
- If Takumi is Alive: He will ask you to punish Sally. You can:
- Kill Sally: Ends the quest.
- Agree to Punish: Leads to a three-way forced fun scene with Sally, Takumi, and the Male MC. This skips the dialogue follow-up of denying Takumi.
- Deny Takumi: Allows an intimate moment with Sally, with three dialogue options affecting your relationship with her.
- If Takumi is Dead: Sally will be alone. You will have a discussion with her and then fight her.
-
Post-Quest Options:
- Leave: Sally will not allow intimate moments.
- Partake: See the intimate scene and gain 2 dialogue options.
- Submit to Sally: No intimate moments allowed, and the quest ends.
- Make Sally Submit: Get new options if Takumi is alive or intimate moments if not. If Takumi is alive, you can punish and tie Sally up for forced fun. If not, intimate moments are allowed.
Tenth Quest: The Non-Existent Item
Yona Quests
P*nis Stone
-
Objective: Obtain the P*nis Stone from the ruins northeast of the Chieftan’s village.
-
Location: In the ruins, there is a raised platform with a headless female statue. Another platform to the east has a red fog wall. Entering the red fog wall will lead to a scene where Hat and Bandana discuss how to open the ruins.
-
Enemies:
- Hat:
- Molotov: Throws a Molotov cocktail setting a large area on fire. Avoid by staying away from the burning area.
- Shotgun: Fires 5-7 bullets randomly. Avoid by moving erratically.
- Butt Bash: Uses the butt of the shotgun to bash. Stay at a distance to avoid.
- Bandana:
- Punch: Throws a punch with his arm pulled back. Avoid by moving through him during the wind-up.
- Jump Kick: Crouches and jumps with a raised knee, dealing multiple hits. Move diagonally to avoid.
-
Defeat:
- After defeating both, Hat and Bandana will argue and explode, dropping the P*nis Stone.
- Use the P*nis Stone on the headless female statue to open the ruins.
Brain
-
Objective: Obtain the Cassie Brain and help Cassie.
-
Location: North of the ruins, find a village, and further north, a man tied to a post. Agree to help him, then fight a Large Native and three Male Natives. Proceed through the lab’s red fog wall to learn about the lab and fight Cassie.
-
Cassie Android’s Attacks:
- Punch: Massive damage if she stops and punches. Keep moving to avoid.
- Arm Shot: Holds out an arm and fires it. Move diagonally to avoid damage.
-
Defeat:
- If defeated by Cassie, Yona will be beheaded, followed by a scene where Cassie, with Yona’s face, has forced fun with an old man.
- Upon defeating Cassie, her head will fall off, and the old man will order her to kill Yona. Cassie will turn around and behead the old man instead, collapsing to the ground.
- Obtain the Cassie Brain.
-
Lab Access: In the northeast of the room, open a door to access the lab. Near the northern part of the lab, place the brain in a green fog circle. Cassie will request her old body.
-
Finding Cassie’s Body:
- Location: Cassie’s body is in the dump at the northernmost part of the lab, within a green fog circle.
- Return: Place the body in the green fog circle to repair Cassie. She will thank you and become a recruitable NPC for crafting like a crafting bench.
Man Quests
Pretty Bench
-
Objective: Defeat the Giantess and obtain the Pretty Bench recipe.
-
Location: In the Chaos Wastes, west of the final quest, find a blue fog wall in a ravine. The Giantess will drop down and confront you.
-
Giantess’s Actions:
- Teleport: Slight crouch and short-distance teleport.
- Leg Slam: Raises a leg creating a rectangular area of effect. Move perpendicular to avoid damage.
- Downward Kick: Deals massive damage. Avoid by moving away.
-
Defeat:
- If you kill the Giantess, you will obtain a Giant Core, which can be exchanged for a Giant Glove from the merchant.
- If you leave, she will be a recruitable NPC upon return.
- If you grab her, you can chain her up as a prop and have forced fun with her.
- If you wait, a new prompt will appear, allowing you to seduce the Giantess for an intimate moment.
-
Pretty Bench Recipe: Behind the boss arena is the Giantess’s home with a bench, mirror, and chest containing the Pretty Bench recipe.
Reika
-
Objective: Navigate the questline involving Reika and Keigo.
-
Location: After defeating Takumi the first time, go south from the Takumi fight to find a green fog circle with Reika and Keigo having an intimate moment. Your actions here affect their relationship.
-
Choices:
- Observe or Make Noise: Observing increases Keigo and Reika’s love, while making noise decreases it. This minorly affects the Man questline for Reika.
- Blue Fog Circle: On a hill to the east, talk with Reika if she was dumped by Keigo. Consoling her increases her love for you by 50.
-
Further Questline:
- Beach Cliff: A blue fog ring slightly south will have Keigo confront Man about Reika. Choices here affect the quest:
- Give Up Reika: Ends the quest line.
- "I Love Reika": Continue the quest with a chance to fight Keigo.
- "I Just Want to Have Fun": Forced to fight Keigo.
-
Keigo’s Attacks:
- Single Strike: Pulls back arm and strikes once. Avoid by running through him.
- Triple Strike: Pulls back arm, then strikes three times. Avoid by running behind him.
- Crouch and Jump: Strikes with a jump. Avoid by not moving and attacking after.
-
Defeat Options:
- Kill Keigo: Lie or tell the truth to Reika. She can become a companion, and you obtain his necklace doubling your damage.
- Observe: Reika will confront you, affecting the outcome.
- Tell Keigo You Love Reika: Reika will dump Keigo and can be intimate with you.
- Other Option: Reika will dump both of you, ending the chance for intimacy.
This detailed walkthrough ensures players can navigate these complex quests with clear instructions and choices.
Shino
Mermaid
Worldly Possessions
-
Plant Bench:
- Location: In the swamp, find a large mud area with small normal terrain spots. The west spot has a chest containing the Plant Bench recipe.
-
Wing Bench:
- Location: After exiting the cave leading to Necks, head south of the mountain path to find a chest with the Wing Bench recipe.
-
Sand Bench:
- Location: From the Scythe boss fight arena (red gem), head northeast to a high-level natives' village. There is a chest on the edge of the water containing the Sand Bench recipe.
-
The Merchant:
- Location: Northwest edge of the desert and plains on a small mountain.
- Items for Trade:
- Berry: Christmas bench with holiday items.
- Sand: Summer bench with beach items.
- Candy, Green Blood, Pumpkin: Halloween bench with costumes and items.
- Dead Orb: Halloween raid summon.
- Giant Orb: Giant glove.
- Life Orb + Rejuvenation Potion: Secret rejuvenation potion to turn old natives into elder natives.
- Fighter Orbs: Can be exchanged for Diamonds, Miko outfit parts, or a bell necklace.
Bases
-
Building a Base:
- No strict requirements, but essential to have benches and a furnace for weapons and shields.
- Walls: Slow enemy attacks and base destruction.
- Spikes & Structures: Damage or faint enemies. NPCs are recommended for defense.
-
Raids:
- Triggers: Scout spotting, flares set out.
- Raid Types: Raiders attempt to kidnap NPCs or players (except named NPCs). Use items like the horn to summon ortems to modify raids (e.g., level, number, gender of raiders).
-
Base Recommendations:
- Home Base: For storage and main activities.
- Raid Base: Flagged base to attract raids with an NPC wearing a Skull Necklace. Fighter orbs from level 50+ raids and elite NPCs from level 100+ raids.
NPC Combat, Controls, and Care
This chapter covers handling NPCs, including both hostile and friendly ones. It will be divided into NPC types, interactions, and equipment.
Combat
Combat with NPCs involves understanding their stats, which include:
- Level: Determines the NPC's strength and difficulty.
- Damage Type and Amount: Impacts how much damage they inflict.
- Attack Cooldowns: Affects how frequently they can attack.
Health Bars:
- Red Bar: Standard health, depleted by normal weapons, unarmed attacks, and falling off cliffs in specific areas. NPCs with no ally status will die permanently if this bar depletes.
- White Bar: Faint health, affected by faint weapons or specific faint attacks. NPCs can be captured if this bar is depleted before the red bar.
General Combat Tips:
- Choose Your Weapon: Understand its range and attack speed.
- Combat Strategy: Allow enemies to attack while dodging, then use heavy attacks. Repeat until victory.
- Specialization: Adapt your strategy based on your preferred fighting style or weapon mastery.
NPCs and Their Combat Characteristics:
- Spider: Weakest enemies, found in spider caves. Deal with them using melee attacks. They are slow and deal minimal damage.
- Bat: Have 8 health, are hard to see, and deal low damage. Use weapons dealing 8+ damage or move through them and attack from behind.
- Snail: Deals 1 damage and can hide below objects. Find and eliminate it quickly.
Additional NPCs and their specifics:
- Crab
- Bee
- Angler
- Shark
- Werewolf
- Bigfoot
- Milky
- Neck
- Skeleton
- Daddy
- Dog Guardian
- Guardian
- Mummy
- Underground Man
- Underground Old Woman
- Underground Woman
- Vampire Scorpion
- Worm
- Ent
- Cursed Tree
- Whooper
- Leech
- Nepenthes
- Alligator
- Crawdad
- Male Native
- Big Native
- Female Native
- Native Girl [patch]
- Native Boy [patch]
- Native Grandpa
- Native Grandma
- Elder Brother
- Elder Sister
- Petite Native
- Amazon [patch]
Each NPC may have unique combat mechanics, health stats, and methods for dealing with them. For a complete strategy, refer to detailed guides or in-game experiences for specific NPCs not listed.
Taming NPCs
Taming NPCs involves three steps:
- Knocking them unconscious: Use faint weapons for this purpose.
- Placing them in a suitable taming space: There are various types of taming spaces depending on the NPC size.
- Providing them with food: Different NPCs prefer different foods, and their taming efficiency depends on the type of food provided.
Types of Taming Spaces:
- Wood Fence (Small): For small animals like chickens, rabbits.
- Wood Fence (Large): For medium-sized animals like Milky’s, sheep.
- Iron Fence: For larger animals like Bears, Werewolves.
- Wood and Iron Cage: For taming natives; wood for one native, iron for up to three.
Food and Taming:
- NPCs have specific preferred foods that affect taming speed. Typically, foods that provide minimal hunger satisfaction are preferred for quicker taming.
- Example: Male Natives prefer large cooked meat (7), berries, and other foods.
Taming Process:
- Once taming reaches 100%, it will display "MAX".
- To set an NPC free to wander, place them in your inventory, right-click to release, and manage their territory and actions via the menu.
Managing NPCs:
- Territory: Adjust the center of their roaming area.
- Combat Area: Define where they will fight hostile NPCs.
- Waiting Pose: Configure idle animations when not wandering.
Friendly NPCs:
- If a friendly NPC dies in combat, they remain in a death state until they recover, which may be delayed by factors like lack of food or water.
- If an NPC is "Swept Away" during a raid, a skull icon will appear on the map indicating their location. The Warden, a miniboss, may replace raiders and pose a significant threat. Save NPCs within the allotted time to prevent execution or force-breeding.
Taming Details for Specific NPCs:
- Spider (Cave): Dies upon encounter.
- Spider (Dark Forest): Slow-moving. Taming requires worm (10), butterfly (35), frog (50).
- Bat: Dies upon encounter.
- Hen: Useful for eggs; better to farm rather than tame. Taming requires corn (40), corn seed (40), berry (10).
- Rooster: Useful for roast chicken; not worth taming. Taming requires similar food as Hen.
- Angler: Tough and provides light. Taming requires 8 Bone. Follow cap: 4.
- Shark: Dies upon encounter.
- Werewolf: [Details Needed]
- Bigfoot: Strong and fast. Good for early and mid-game. Taming requires various foods including grilled meat (7), small grilled meat (5), carrot (5), and others. Follow cap: 6.
- Milky: [Details Needed]
- Neck: [Details Needed]
- Skeleton: [Details Needed]
- Daddy: [Details Needed]
- Dog Guardian: [Details Needed]
- Guardian: [Details Needed]
- Mummy: [Details Needed]
- Underground Man: [Details Needed]
- Underground Old Woman: [Details Needed]
- Underground Woman: [Details Needed]
- Vampire Scorpion: [Details Needed]
- Worm: [Details Needed]
- Ent: [Details Needed]
- Cursed Tree: [Details Needed]
- Whooper: [Details Needed]
- Leech: Dies upon encounter.
- Nepenthes: Cannot interact, dies upon encounter.
- Alligator: [Details Needed]
- Crawdad: [Details Needed]
- Male Native: Common and effective for damage. Taming specifics: [Details Needed]
- Big Native: [Details Needed]
- Female Native: [Details Needed]
- Native Girl [patch]: [Details Needed]
- Native Boy [patch]: [Details Needed]
- Native Grandpa: [Details Needed]
- Native Grandma: [Details Needed]
- Elder Brother: [Details Needed]
- Elder Sister: [Details Needed]
- Petite Native: [Details Needed]
- Amazon [patch]: [Details Needed]
This guide provides a basic framework for taming NPCs and managing their roles. For more specific details on some NPCs, additional research or in-game experience may be required.
Equipables and Outfits
This section covers various tools, weapons, and shields, detailing their effects, who can equip them, and their functionalities. Crafting recipes and locations are not included here; refer to the materials, crafting, and crafting locations section for those details.
Tools and Weapons
1. Arrows
- Arrow: Personal craft. Short-range, deals 30% of the bow's max damage.
- Feather Arrow: Personal craft. Accurate and short-range, deals 50% of the bow's max damage.
- Iron Arrow: Personal craft. Accurate and long-range, deals 80% of the bow's max damage.
- Note: NPCs use Feather Arrows by default and do not use arrows from the inventory.
2. Axe
- Description: Used to cut down trees. Deals 1+attack damage; heavy attack deals (1+attack)*3 damage.
- Equipable: Yona, Man, Male Native, Native Boy, Female Native, Native Girl, Young Man.
3. Club
- Description: First faint weapon, deals 2 faint damage; heavy attack deals 4 faint damage.
- Equipable: Yona, Man, Male Native, Native Boy, Female Native, Native Girl, Young Man.
4. Pick Ax
- Description: Used for mining stones. Deals 1+attack damage; heavy attack deals (1+attack)*3 damage.
- Equipable: Yona, Man, Male Native, Native Boy, Female Native, Native Girl, Young Man.
5. Wood Bow
- Description: Shoots arrows, deals Strength damage melee or attackarrows damage at range. F is a melee attack only, dealing roughly 2.5attack damage.
- Equipable: Yona, Man, Nami (not included), Female Native, Native Girl (best user).
6. Bug Net
- Description: Captures small animals, deals 1+attack damage; heavy attack deals (1+attack)*3 damage.
- Equipable: Yona, Man.
7. Wooden Fishing Rod
- Description: Used for fishing; deals 1+attack damage; heavy attack deals (1+attack)*3 damage.
- Equipable: Yona, Man.
8. Wooden Shovel
- Description: Obtains soil, sand, or clay; deals 1+attack damage; heavy attack deals (1+attack)*3 damage.
- Equipable: Yona, Man.
9. Wood Sword
- Description: Starter weapon; deals 6+attack damage; heavy attack deals (6+attack)*3 damage.
- Equipable: Yona, Man, Young Man.
10. Bat
- Description: Faint weapon; deals 5 faint damage; heavy attack deals 10 faint damage.
- Equipable: Yona, Man, Young Man.
11. Spear
- Description: Upgrade from the wooden sword; deals 8+attack damage; heavy attack deals (8+strength)*damage.
- Equipable: Yona, Man, Keigo, Young Man, Elder Sister Native.
12. Iron Shovel
- Description: More durable shovel; deals 1+attack damage; heavy attack deals (1+attack)*3 damage.
- Equipable: Yona, Man.
13. Iron Sword
- Description: Better melee weapon; deals 12+attack damage; heavy attack deals (12+strength)*3 damage.
- Equipable: Yona, Man.
14. Diamond Wand
- Description: Alternative heavy weapon; deals 20+attack damage; heavy attack sends projectiles.
- Equipable: Yona, Man, Young Man.
15. Diamond Dagger
- Description: Deals 25+attack damage; heavy attack shoots a projectile or deals triple damage if it hits directly.
- Equipable: Yona, Man, Young Man.
16. Iron Axe
- Description: Cuts hard wood; deals 2+attack damage; heavy attack deals (2+attack)*3 damage.
- Equipable: Yona, Man, Male Native, Female Native, Young Man, Elder Brother Native.
17. Diamond Axe
- Description: Cuts living wood; deals 3+attack damage; heavy attack deals (3+attack)*3 damage.
- Equipable: Yona, Man, Young Man.
18. Iron Club
- Description: Upgrade faint weapon; deals 10 faint damage; heavy attack deals 20 faint damage.
- Equipable: Yona, Man, Male Native, Native Boy, Female Native, Young Man.
19. Diamond Club
- Description: Further upgrade faint weapon; deals 20 faint damage; heavy attack deals 60 faint damage.
- Equipable: Yona, Man, Young Man.
20. Iron Net
- Description: Captures aggressive small animals; deals 1+attack damage; heavy attack deals (1+attack)*3 damage.
- Equipable: Yona, Man.
21. Iron Pick Ax
- Description: Mines Chaos Ore; deals 2+attack damage; heavy attack deals (2+attack)*3 damage.
- Equipable: Yona, Man, Male Native, Female Native, Young Man.
22. Diamond Pick Ax
- Description: Mines Chaos Ore; deals 3+attack damage; heavy attack deals (3+attack)*3 damage.
- Equipable: Yona, Man, Young Man.
23. Chaos Axe
- Description: Mines all stone and woods; deals 4+attack damage; heavy attack deals (4+attack)*3 damage.
- Equipable: Yona, Man.
24. Head Club
- Description: Simple weapon; deals 8+attack damage; heavy attack deals (8+attack)*? damage.
- Equipable: Yona, Man, Young Man.
25. Primal Saw
- Description: Powerful weapon before blood weapons; deals 12+attack damage; heavy attack deals (12+attack)*3 damage.
- Equipable: Yona, Man, Male Native, Female Native, Young Man.
26. Blood Sword
- Description: Strong weapon for NPCs; deals 22+attack damage; heavy attack destroys bodies dealing (22+attack)*3 damage.
- Equipable: Yona, Man, Male Native, Female Native, Young Man.
27. Blood Knife
- Description: Knife for dismembering; deals 17+attack damage; heavy attack deals (17+attack)*3 damage.
- Equipable: Yona, Man, Native Girl, Young Man.
28. Knife
- Description: Knife for dismembering; deals 10+attack damage; heavy attack deals (10+attack)*3 damage.
- Equipable: Yona, Man, Native Girl, Young Man.
29. Bat
- Description: Bat with nails; deals 11+attack damage; heavy attack deals (11+attack)*3 damage.
- Equipable: Yona, Man, Reika, Young Man.
30. Cactus Sickle
- Description: Made from cactus; deals 15+attack damage; heavy attack deals (15+attack)*3 damage.
- Equipable: Yona, Man, Young Man.
31. Battle Axe
- Description: Powerful weapon; deals 22+attack damage; heavy attack deals 22*5+attack damage.
- Equipable: Large Native.
32. Katana
- Description: Highly powerful weapon; deals 40+attack damage; heavy attack deals (40+attack)*2 damage and can teleport the player.
- Equipable: Yona, Man, Young Man.
33. Magic Wand
- Description: Strange weapon; deals 18+attack damage; heavy attack deals (18+attack)*2.5 damage, leaves a healing heart.
- Equipable: Yona, Native Girl.
34. Guardian Sword
- Description: Found on the level 10 guardian; deals 40+attack damage; heavy attack deals (40+attack)*2 damage.
- Equipable: Yona, Man, Large Female Native, Ancient Guardian (boss), Young Man.
35. Giant Club
- Description: Only equipable by Large Natives; deals 14+attack damage.
- Equipable: Large Native.
36. Odachi
- Description: Found on high-level Large Natives; deals ?+attack damage.
- Equipable: Large Native.
37. Savage Axe
- Description: Only equipable by Female Large Natives; deals 27+attack damage; heavy attack sends the user dashing forward.
- Equipable: Female Large Native.
38. All Others
- Note: Only equipable by named characters, found on them.
Shields
Shields are used to block attacks. Right-click blocks, and a perfect block occurs if timed right before an attack hits.
1. Wooden Shield
- Description: Blocks 50% damage; perfect block reduces damage to the shield by 50%.
- Equipable: Man, Yona.
2. Bone Shield
- Description: Blocks 75% damage; perfect block reduces damage to the shield by 50%.
- Equipable: Man, Yona.
3. Iron Shield
- Description: Blocks 100% damage; perfect block reduces damage to the shield by 50%. Reduces speed by 20%.
- Equipable: Man, Yona.
4. Spider Shield
- Description: Blocks 75% damage; perfect block reduces damage to the shield by 50%. Reduces enemy speed on hit.
- Equipable: Man, Yona.
5. Cactus Shield
- Description: Blocks 90% damage; deals 50% of initial damage back to the enemy; perfect block reduces damage to the shield by 50%.
- Equipable: Man, Yona.
6. Wing Shield
- Description: Blocks 90% damage; perfect block reduces damage to the shield by 50%. Increases speed by 10%.
- Equipable: Man, Yona.
7. Shell Shield
- Description: Blocks 90% damage; perfect block reduces damage to the shield by 50%. Reduces speed by 10%.
- Equipable: Man, Yona.
8. Meat Shield / Meat Shield B
- Description: Blocks 80% damage; deals initial damage back as faint damage. Perfect block reduces damage to the shield by 50% and deals additional faint damage.
- Equipable: Man, Yona.
9. Mushroom Shield
- Description: Blocks 200% damage, turning it into healing. Perfect block doubles healing gained.
- Equipable: Man, Yona.
10. Mirror Shield
- Description: Reflects damage back to the enemy; perfect block reduces damage to the shield and player by 100%.
- Equipable: Yona, Native Girl.
11. Poison Shield
- Description: Blocks 90% damage; releases poison in an area affecting only hostile enemies.
- Equipable: Yona, Native Girl.
12. Savage Shield
- Description: Reduces damage by 90% when blocking.
- Equipable: High-level raid Large Female Native only.
13. Pumpkin Shield
- Description: Reduces damage by 100% when blocking.
- Equipable: High-level Halloween raid Large Female Native only.